Hey, Ya’ll! Welcome back to SP&H!
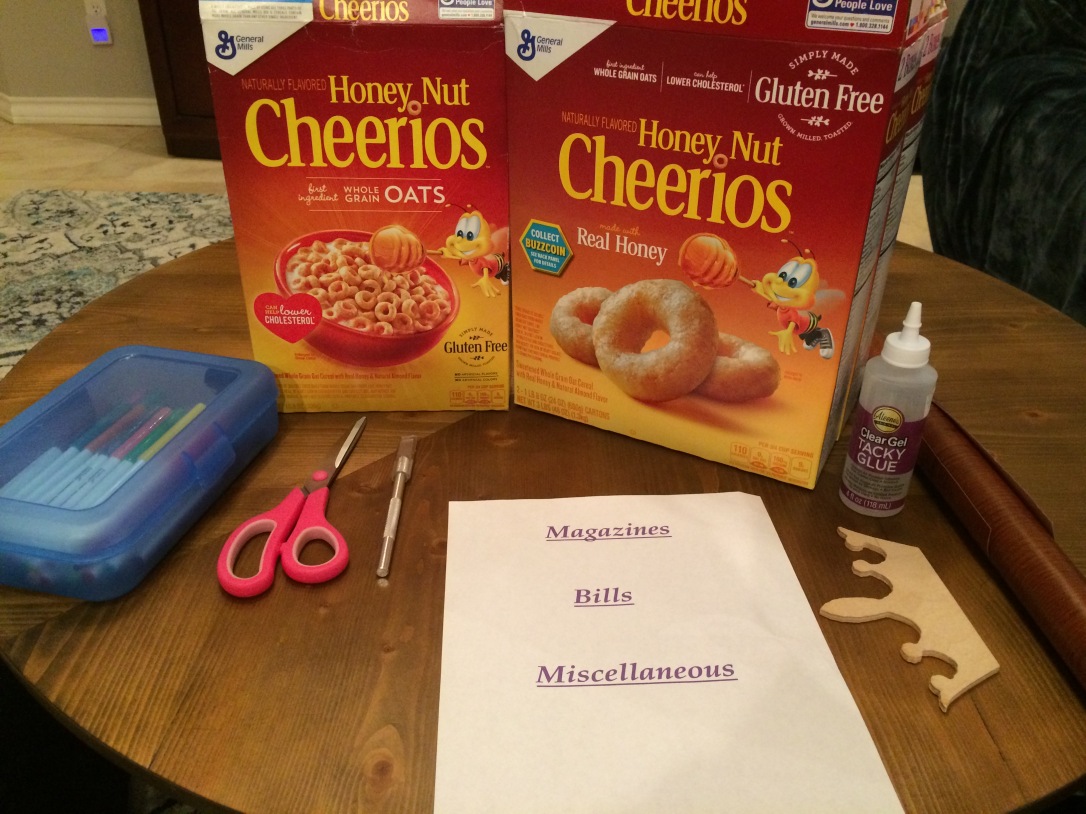
Today, I want to show you how to make your own mail sorter. Now, you may not still get snail mail but I get bills, making it easier to keep track of my debt I’m paying off, magazines and everyone that has an address receives junk mail. But I’m gone from home enough that my roommate puts my mail in a pile on my desk. When I get home and sort through it, it still ends up in piles as my small sorter doesn’t do the job. But mail sorters aren’t cheap at the store or on Amazon. So, I made my own out of cereal boxes, sticky contact paper, labels and a wooden crown decoration.
Here is how I did it.
First, a picture of what I started with.
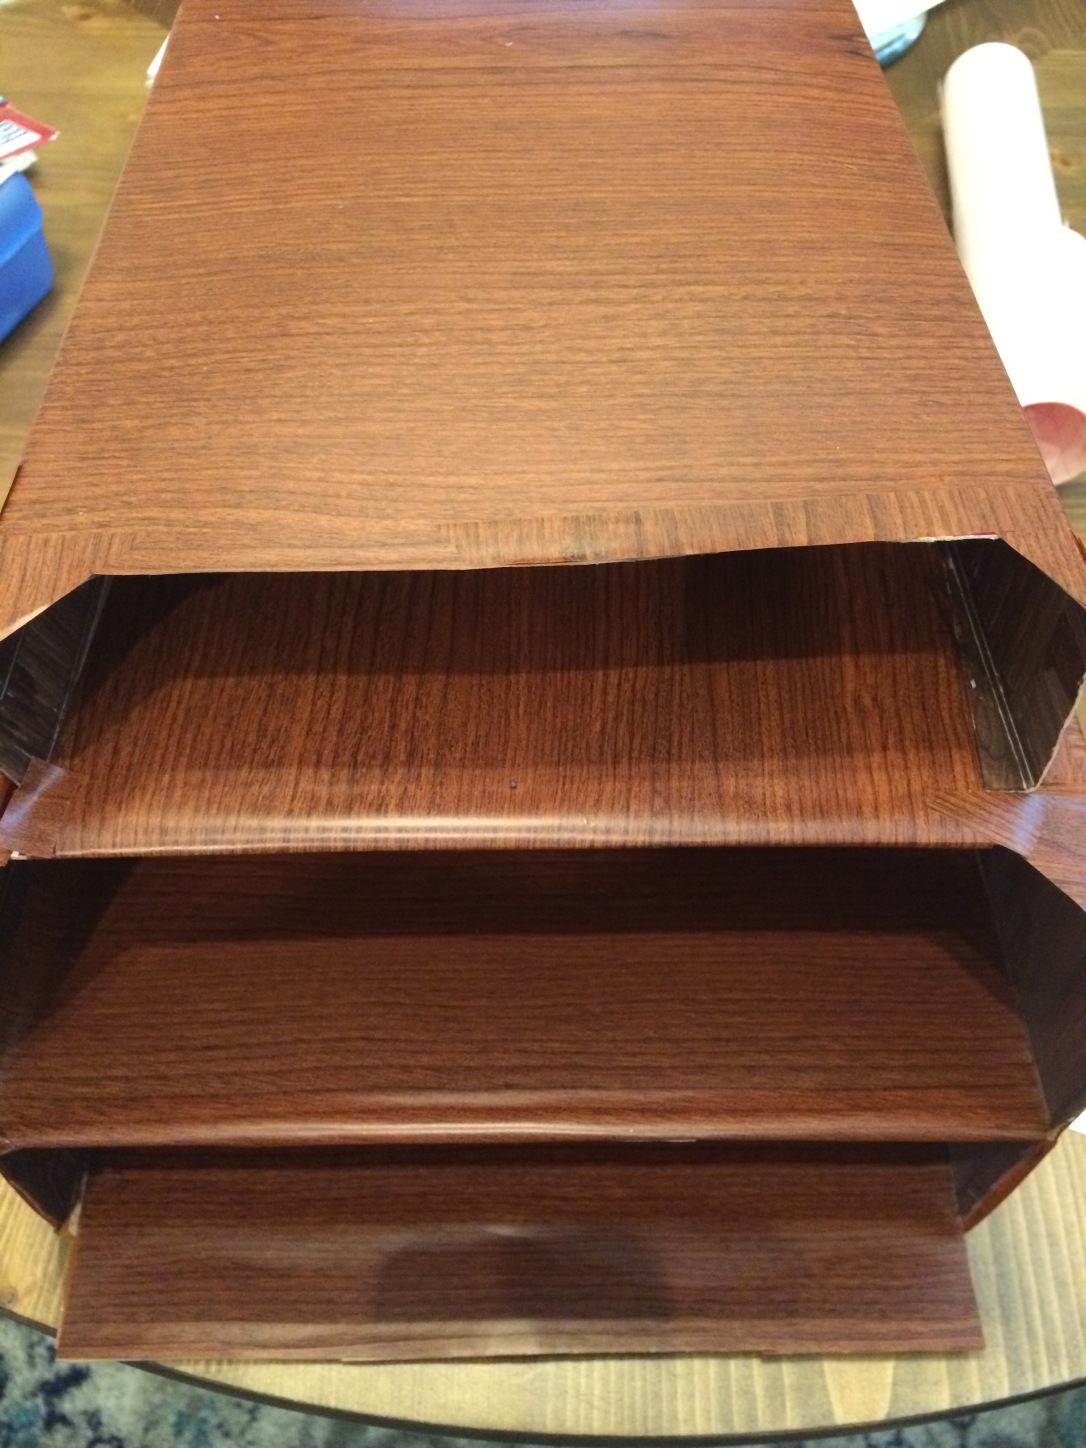
- Two of my boxes were from a bulk buy at Sams Club and were already glued together. The smaller one was glued on top and I cut off the flaps of all three except the bottom flap on the bottom cereal box. I used it to ensure my label was visible. I also cut an opening into the top big box and one into the smaller box on top to not only make the label visible but also the mail inside.


- The next step was to cover all three boxes in adhesive Contact paper. Now, you can use any contact paper you like. This is your mail sorter. I used faux wood contact paper I already had on hand. Plus, my previous sorter was actually wooden. This step will take you the longest as you have to make sure the entire outside of the cereal boxes are covered. After all, you don’t want it immediately visible that these were cereal boxes. You may also choose to paint the inside of the boxes on the side with either a marker or I chose a paint marker. You’re not looking directly inside after all.
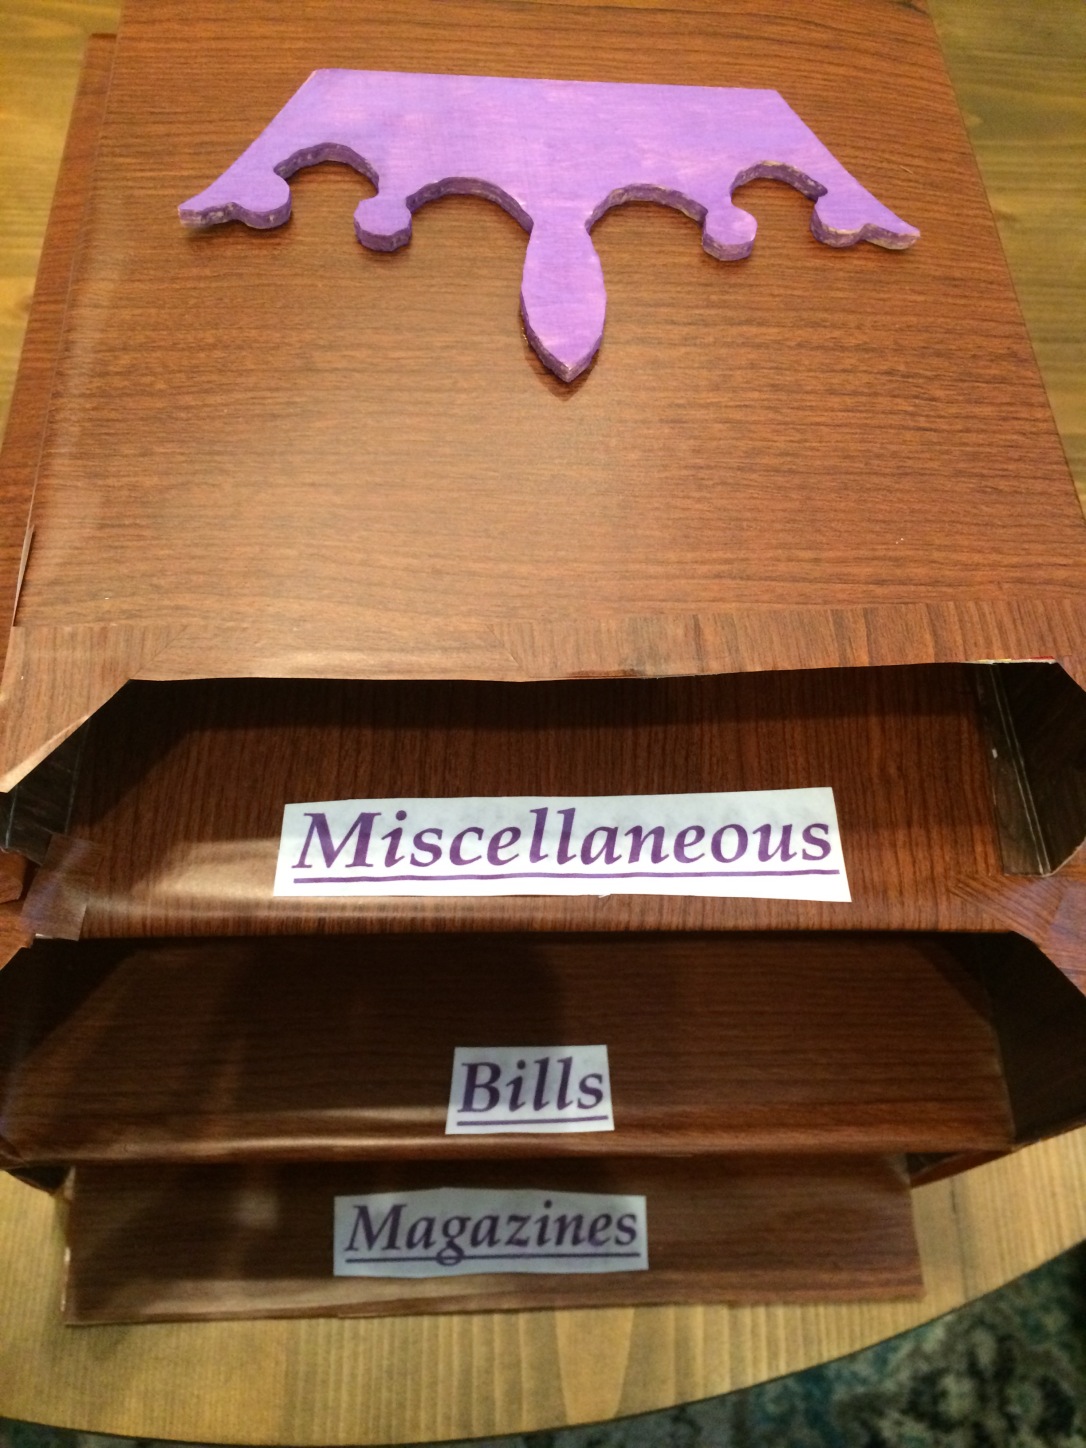
You can’t even see the parts that were painted, can you? So feel free to paint the inside to help yourself not spend all day fighting with contact paper. - After contact paper is applied, you glue the labels of each section. You can do this however you like, you may only get enough mail to need an in section, out section and junk section. I made the bottom section for my magazines, the second for my bills and the third for junk mail for my roommate just in case she’s not certain it’s junk. That way, she’s not tossing something I actually want. Plus, occasionally I have mail that doesn’t fit in either, like letters from friends in my hometown. You also can add any decoration to personalize this. I had a wooden crown that I painted one of my favorite colors, purple, and glued on top. That way, I don’t just have plain block of cardboard and contact paper. Plain is boring to me. But you do you. If you prefer minimalist style, then you don’t have to add anything.
So, here’s the final product: 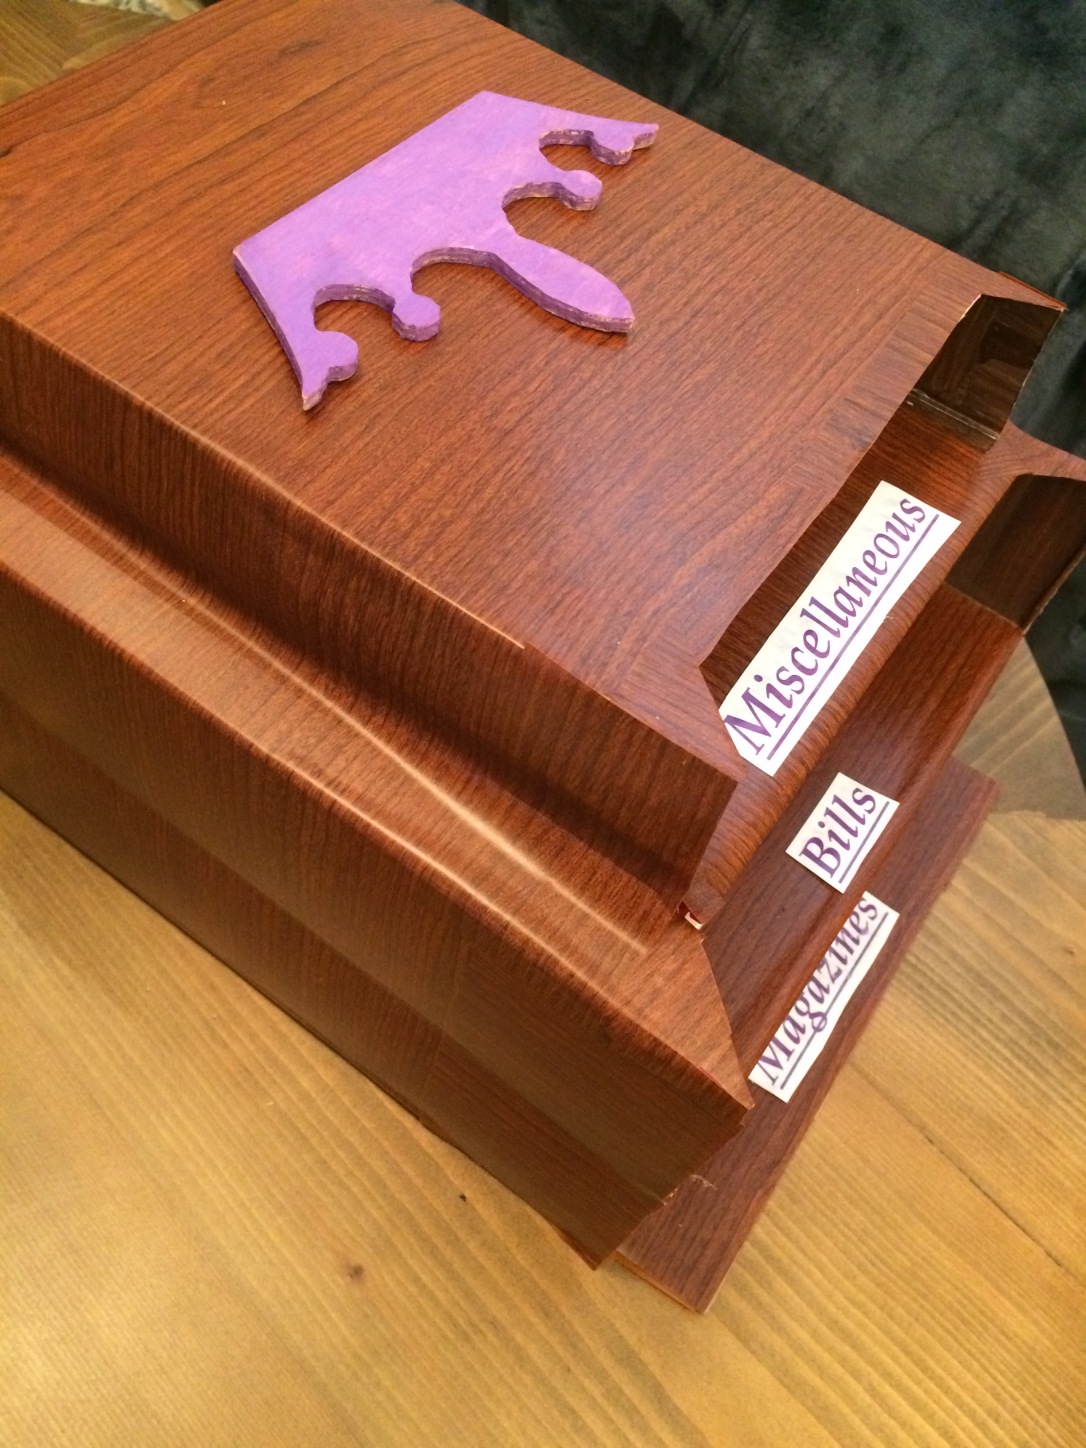
That’s all for today. Please, comment below, adding pictures if you like, if you make a mail sorter of your own! Also, comment down below other DIY projects you’d like to see me do or give instructions on! I’m always looking for new DIY ideas.
‘Til Next Time!
~Paula